How to obtain your CloudFront Key Pair ID and Private Key
In order to utilize the CloudFront feature with S3 Media Maestro, you will need to obtain your CloudFront Key Pair ID and Private Key. Simply follow these steps to do so.
-
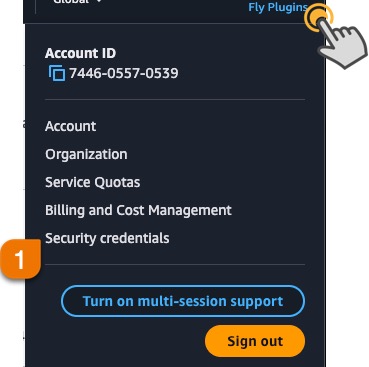
Login to your AWS account and click your account name in the upper right hand corner and click Security Credentials.
-
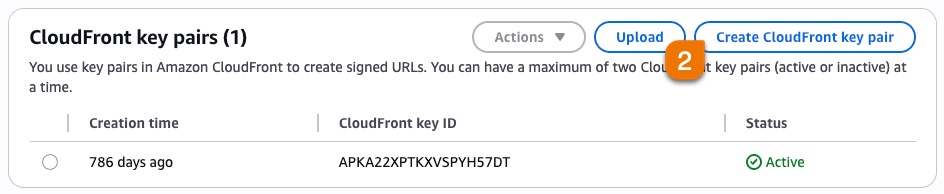
Next Find the CloudFront Key Pairs section and click the plus symbol. Then click Create New Key Pair.
-
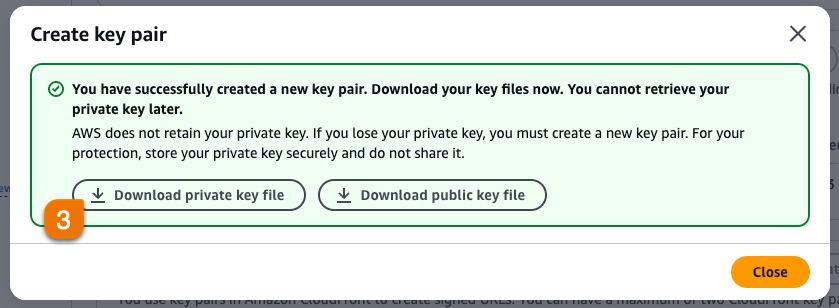
This step is very important, be sure not to skip this step. A pop up window will appear, click the Download Private Key File button. A file will then download, be sure to keep that file in a secure location. We will need this file in a later step.
-
Now that we have created our new key pair, we will need to configure S3 Media Maestro. Login to your WordPress site and navigate to Settings→S3 Media Maestro and click the Amazon: CloudFront tab.

-
Insert the CloudFront Key ID from Amazon into the CloudFront Key Pair ID field in the S3 Media Maestro CloudFront settings.
- Lastly you will need to obtain your Private Key from the file downloaded in step #4. Find the file that you downloaded and open it up in a text editor application. On Windows you can use something like NotePad, and on Mac you can use TextEdit. You will see a block of text that starts with -----BEGIN RSA PRIVATE KEY----- and ends with -----END RSA PRIVATE KEY-----. Copy ALL the text to your clipboard and place it into the Cloudfront Private Key text area in the S3 Media Maestro Cloudfront settings and click Save Settings.


You have now successfully setup S3 Media Maestro with you CloudFront credentials.